
7 Must-Follow Steps You Should Do After Installing WordPress
You have successfully installed WordPress on your blog. No idea what you should do after installing WordPress?
Don’t worry. I am here to help you to get rid of this kinda situation.
What You Should Do After Installing WordPress
I know you are in a hurry to start your blogging right now and start writing and publishing the ideas you have kept in your mind for years.
This is a very natural being like that. In fact, when I started my blog, my thoughts were as same as yours.
You have to keep patience buddy. there are some basic setups to do before start writing and publishing your content.
If you wanna know how to install WordPress there is a detailed guide with A2 Hosting, Hostgator, Bluehost and Inmotin Hosting.
Let’s begin-
1. Fix your Site Title, Tag Line and Time zone
If you have changed your site title and tagline while installing WordPress, you will not need to change this again. But I will tell you to recheck.
If it comes with a dummy title and tagline by default, you have to change it after installing WordPress.
It’s a very easy task and you can do it in a fun way. Go to the WordPress dashboard> settings>general.
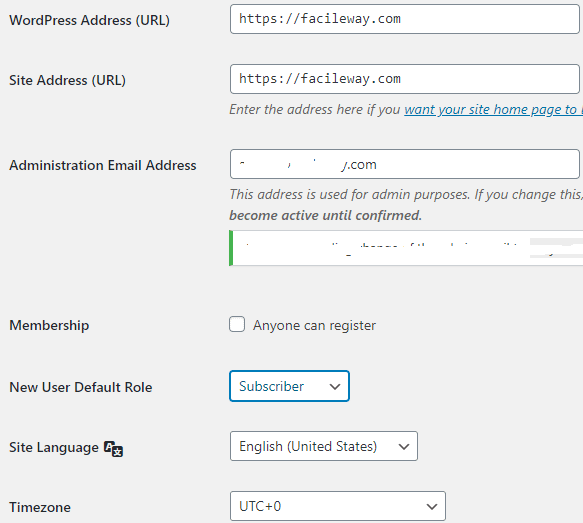
You will the following features that you have to change as your site requirement.
- Tagline: Tagline that will describe your site and your business. My tagline is -A Facile Way To Start Blogging.
- WordPress/ Site Address: Enter your site URL here. Both will be the same in value.
- Email: Enter your email Which will be used as the primary one.
- Membership: I have unchecked this one as I don’t anyone to sign up for my site.
- New user default role: Select the Subscriber option.
- Site language: Select the language, you prefer.
- Timezone: You can set this as your country’s time zone. it will help you to publish your content at that time.
- Date/Time format: you can choose any format you want. There is no big deal with this.
2. Delete the default content
You should delete all the default content after installing WordPress. There are also some sample pages and posts that are irrelevant to your blog and do not add any value rather it may be trouble for your blog.
Just go to the Post>default post( Hello world)>check it>Bulk actions>move to trash.
Now go to > Sample page and delete the pages in the same process.
3. Set up your category
It’s a very important task to categorize your blog post. For example, FacileWay writes about Blogging, Affiliate Marketing, Web Hosting, and SEO.
If they do not assign their content according to the category it will be hard for their audience to find out the desired article.
If you are writing an article about men’s clothing, you should assign your article to that category.
If you are writing an article on kids’ clothing you should assign your article that category.
It will help your audience to find out their expected content easily by surfing their desired category.
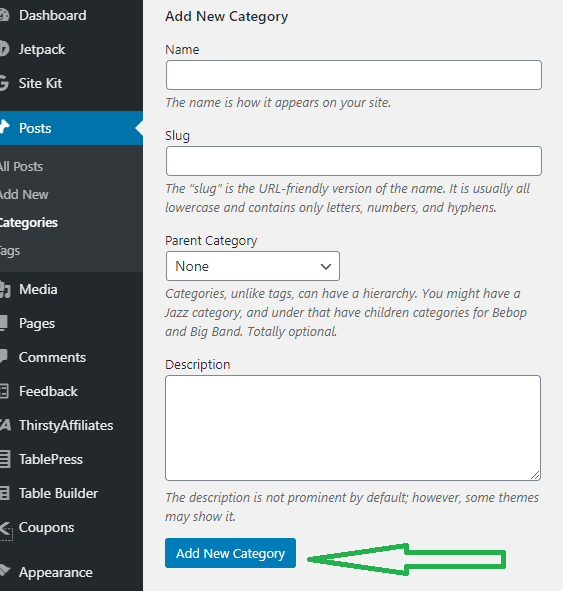
It’s a very easy task. Just go to Posts > Categories, enter a name and slug. Click on “Add new category”.
You can set up your default category. Go to the settings > Writing and choose the default post category as “Blogging”.
If you set up a default category, your blog post will automatically be assigned under that category.
4. Set up permalink structure
Google loves clean and short links for an article. If you love Google’s law, Google is gonna love your article. When Google loves articles, it will rank for sure.
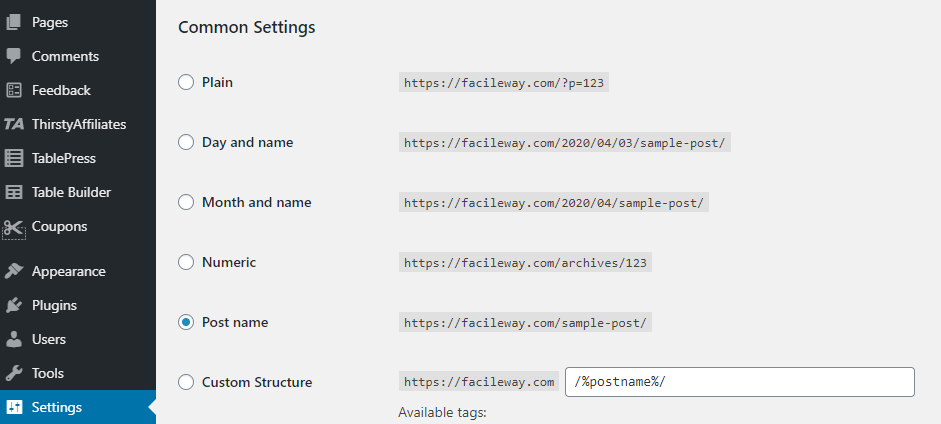
This is why you need to make your permalink short and simple. To make your permalink Google worthy, Go to settings>Permanlinks>select post name as your URL structure.
5. Install WordPress Plugins
WordPress Requires its plugin to increase its functionality. To install a WordPress Plugin, go to plugin>add new>search your plugin/upload your plugin.
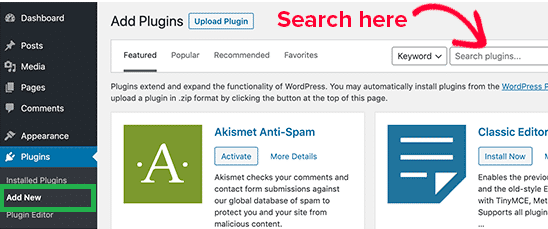
Search your plugin here and Install then don’t forget to activate the plugin. You will find the all free plugins searching here.
When you will use the upload option to upload a plugin. you will see the following option.
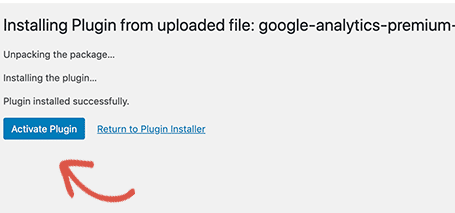
If you want to use the paid plugin, you have to use the upload option. Then you have to activate the after uploading your plugin. Check here this must-have WordPress plugin.
These plugins will insanely improve your site productivity. In the mentioned link there are 20 WordPress plugins I have explained.
Among them, You have to install the following plugin at the initial stage before starting to publish the articles-
- WP Super Cache
- Yoast SEO WordPress Plugin
- Jetpack
- Akismet
- WordFence Plugin
- Broken Link Checker
- Grammarly
- Social Warfare
6. Submit your site to the Google search console
You have to submit your site to the Google Search console. You can do this task easily with Yoast SEO. You can do it with a few clicks with this amazing SEO tool.
7. Choose a theme
The beauty of a site is defined by its theme. You can easily start your blog or business
with a free theme. But it’s always a good idea to start something with a pro theme.
If you wanna have a free theme, you will find tons of Free Themes on WordPress Directory.
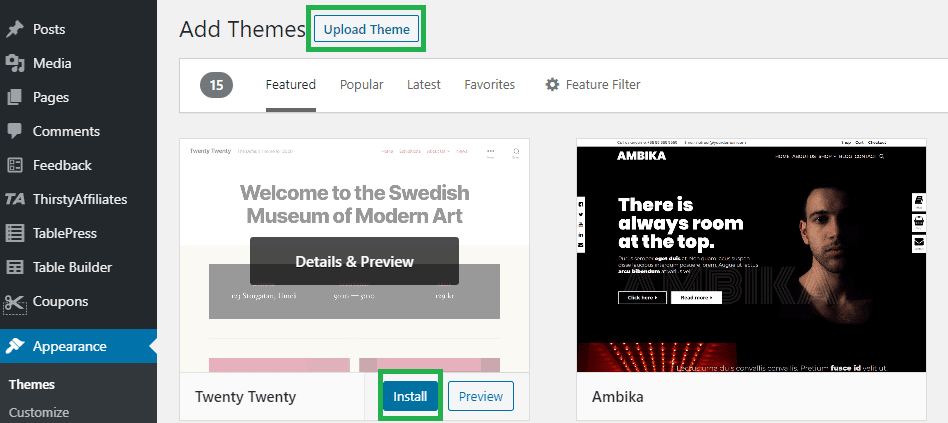
If you wanna try a paid theme, you have to buy the theme from their site. Then they will send you a zip file to your email address. You have to upload the zip file using the upload theme feature.
I have two recommendations for paid themes Astra and Themify.
Read,
Choosing a theme depends on your taste and budget. You may choose anything like your site requirement.
If you wanna have a paid theme and your budget is small try For Astra and if you can gear up your budget a little more, you should try Themify. Themify comes with a lifetime deal that can also save you huge recurring expenses.
Conclusion
Above are basic must-follow steps you should do after installing WordPress. I hope you have loved this post, please feel free to share it with your friends and let them know what they should do after installing WordPress.
![How to Add an Author Info Box in WordPress Posts [Easy Hacks]](https://facileway.com/wp-content/uploads/2020/12/How-to-add-an-author-info-box-in-WordPress-Posts-768x432.png)
![5 Best Free WordPress Author Box Plugins [2024 Edition]](https://facileway.com/wp-content/uploads/2021/01/Free-WordPress-Author-Box-Plugins-To-Add-Author-Bio.png)
Hi Sayem,
This is an insightful post about Must-Follow Steps You Should Do After Installing WordPress, Enjoyed Reading this .
Regards
Chayan
Thanks buddy. Plz keep inspiring 🙂